By clicking a retailer link you consent to third-party cookies that track your onward journey. This enables W? to receive an affiliate commission if you make a purchase, which supports our mission to be the UK's consumer champion.
How to deep clean your kitchen appliances

Drawing on nearly half a decade at Which?, Natalie helps readers cut through the noise with practical guidance on trending products, pest control, cleaning advice and money-saving tips during the sales.

From grease and grime to forgotten leftovers and dirty detergent drawers, kitchen appliances can get very messy very quickly.
And while a quick wipe-down might keep things looking decent, your appliances need the occasional deep clean to stay hygienic and efficient.
With our tips, and a little elbow grease, you can restore your fridge, air fryer, microwave, washing machine and more to their sparkling best.
Spring cleaning: expert tips and tricks to help you blitz the big clean
Cleaning an oven

Cleaning the oven is top of nobody's wish list, but paying it a bit of regular attention will keep the job from being one you dread.
Always turn off your oven at the mains before starting to clean.
- Cleaning the inside There's a wide choice of cleaning products for this task – make sure you pick up one of the best oven cleaners from our testing to make light work of burnt-on grease and grime. Alternatively, some people swear by more natural methods, such as bicarbonate of soda, lemon and vinegar.
- Cleaning the glass door If you can't see through your oven door, start by using a glass scraper followed by a soft sponge. Scourers can cause tiny scratches in the glass that weaken it. If the glass is removable, do this very carefully, as a knock could put a hairline fracture in it, which may lead to shattering in the future.
- Cleaning the metal shelves Remove and soak in warm, soapy water or use an oven cleaning kit which comes with specialised bags for shelves. If your sink isn't big enough, you could use a bin bag.
Stop your oven getting needlessly grimy in the first place by using a lid on bubbling dishes or placing a tray underneath to catch stray drips.
If you truly loathe this task and are in the market for a new oven, you might want to consider a self-cleaning model.
Read our full guide on how to clean your oven, or find out how self-cleaning ovens work
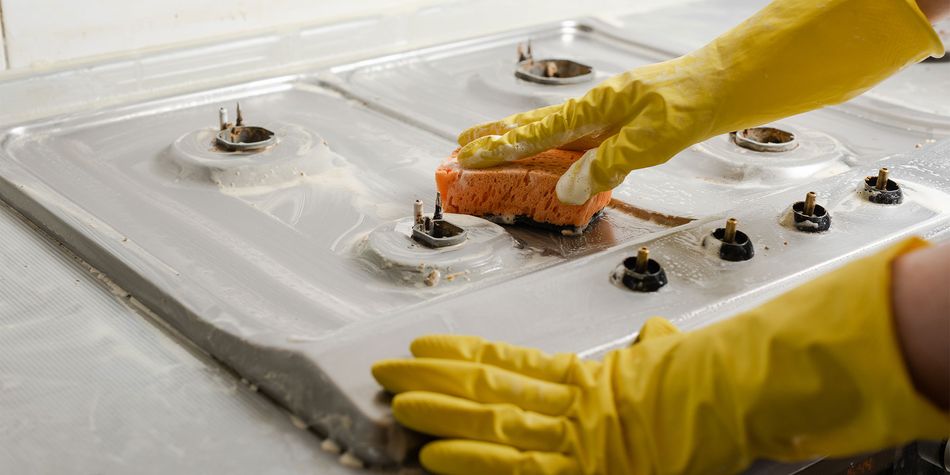
Cleaning a hob

A simple wipe-over may be all a flat, touch-control induction hob needs to keep it grime-free. But if you have a gas hob, or end up with burnt-on cooking spills, then more effort will be needed.
Whatever type you have, clean your hob as soon as it's cool enough. Leave it for longer, and you'll need to apply much more elbow grease.
- For electric ceramic or induction hobs, use a hob scraper to loose any stubborn grime, then follow up with a cream cleaner or de-greaser.
- For gas hobs, remove the pan supports and clean them in warm, soapy water. Use a clean toothbrush or other small brush to get into those awkward nooks and crannies around the burners.
- For extractor fans, remove them and soak them in hot soapy water with a sprinkle of baking soda for at least 10 minutes, then scrub with a non-abrasive brush to remove any stubborn grease. Allow to dry fully before putting them back. While they are drying, you can wipe clean any dust and grime in or around the rest of the extractor unit.
Want to find the easiest models to clean? In our extensive testing, we assess how easy it is to clean the surface of hobs and around the dials.
Just go to our hob reviews, and use the 'Ease of cleaning' filter to see hobs that scored at least four stars out of five.
Keep everything in your home spick and span with our guide on how to clean your cleaning appliances
Cleaning an air fryer

You should give your air fryer a quick clean after every use, but occasionally a deeper clean will be required, especially if you use it a lot.
One online 'hack' suggests you should fill the basket with water and washing-up liquid and turn it on, which is potentially very dangerous. Another suggests using a dishwashing tablet to clean inside the basket, but this is just wasteful and expensive. You should also avoid using sponges or clothes made from abrasive materials, as these can damage the inside of an air fryer.
Make sure your air fryer is off and cool before cleaning, and follow these steps:
- Remove the basket and any other removable components.
- Use a paper towel to wipe up any oil and clean the parts with warm soapy water before leaving dry
- With a damp cloth or sponge, clean inside the basket and interior walls.
- Locate the heating element of your air fryer – usually it's found at the top inside the main unit. Depending on the manufacturers' instruction, you'll typically be able to give this a gentle wipe down with a damp cloth. Avoid using too much water.
- Wipe down the outside and around buttons, dials and crevices.
- Wait until everything is completely dry before reassembling the unit.
For further tips and tricks, read our dedicated guide on how to clean an air fryer
Cleaning a microwave

Microwaves are prone to accumulating food mess and dried-on stains. You can loosen tough grease by following these steps:
- Put a bowl of water, mixed with a couple of spoonfuls of white vinegar, or some lemon juice into the microwave.
- Heat on high power for a few minutes, then leave to cool.
- Remove the bowl and wipe over the top, bottom and walls with a damp sponge.
- Remove the plate and clean it separately by hand or in the dishwasher.
For the outside, simply give the door and exterior shell a wipe down with a microfibre cloth to remove dust and food residue. To really make the glass sparkle, buff with a dry microfibre cloth.
Head to our tips on cleaning your microwave for further advice
Cleaning and descaling a kettle

Descaling your kettle every six months or so not only reduces the instances of finding flakes of limescale in your morning cuppa, but can increase the longevity and efficiency of your kettle, too.
It's especially important to descale your kettle if you live in a hard-water area (and you may find you need to do it more frequently). Limescale is the cause of many different kettle faults and you could even void your warranty if you don't do it regularly. It's worth browsing the best kettles for hard water if your current one can't keep up.
Some quick tips for keeping your kettle clean and running smoothly:
- Check your manual to see what the manufacturer recommends. Descaling tablets/solutions are available, or try a more natural home remedy using distilled vinegar or lemon.
- Take out the limescale filter and carefully rinse it under the tap to remove clogged limescale. They're delicate and can break if they get too much hard deposit on them.
- Keep the handle, lid and switches clean with a regular wipe over.
Find additional advice in our guide on how to remove limescale from your kettle
Cleaning a toaster

Toasters can be fiddly to clean, given their penchant for depositing crumbs into every nook and cranny. To clean out your toaster, follow these steps:
- Unplug your toaster, then remove, empty and wipe the crumb tray.
- Turn it upside down over your bin and let excess crumbs drop out.
- Wipe down the exterior and levers. Don't use cream cleaners as they can be abrasive.
- If your toaster is made of stainless steel, buff with a microfibre cloth to leave a fingerprint-free finish.
Time for an upgrade? Discover the best toasters according to our tests
Cleaning a fridge

Forgotten leftovers causing a stink? It might be time to clean your fridge out.
This job should be done two to four times a year, but it helps to regularly wipe up spills and crumbs as well. Try to time your deep cleans for when you have as little food in the fridge as possible, such as the day before a big food shop.
To deep clean your fridge, follow these steps:
- Empty out the fridge and place perishable items into cool bags.
- Take out the shelves and drawers and wash these in the sink with washing-up liquid. Make sure you let any glass shelves come up to room temperature before washing to avoid cracking them. Leave to air dry.
- Use a lukewarm solution of soapy water to clean the interior of the fridge. Avoid using detergent sprays or strong chemicals as the odour can linger on food.
- Wipe everything down from top to bottom, making sure to get into the seals and around the edges. Dry with a dish cloth.
- If you can, unplug the fridge, pull it out and dust or gently vacuum the condenser coils (often found at the back of the fridge).
For more detailed tips, read our guide to deep cleaning your fridge
Cleaning a dishwasher

It's not just cooking appliances that are prone to build up of gunk. Don't neglect to clean the appliances that help you clean.
Keeping your dishwasher properly maintained keeps your plates clean and helps your machine to keep running smoothly. Not doing so can run the risk of blockages, food build-up and unpleasant smells.
Try these deep-cleaning tips:
- Clean the filter You'll find it usually needs cleaning once or twice a month. The filter is often located at the bottom of the machine below the spray arms – simply twist and remove it, then clean it in the sink with hot water and a gentle brush. Make sure you put it back in securely. Check out the 4 signs your dishwasher filter needs cleaning.
- Wipe the door seals Food stuck on the door rim can lead to the seals perishing and your dishwasher leaking. Once a month, wipe of the rim and seals with a damp cloth. Frequent users may need to do this weekly.
- Clean the spray arms Every six months, carefully take out the spray arms and clean under a tap.
- Run a cleaning cycle If your dishwasher has a dedicated cleaning cycle, run it every six months or so. If there isn't one, then run a hot cycle when the dishwasher is empty. Manufacturers recommend using a proper dishwasher cleaner, and we agree. Avoid using any 'natural' alternatives such as lemon juice or white vinegar, or harsh cleaners such as bleach.
For more details and advice, see our advice on cleaning your dishwasher
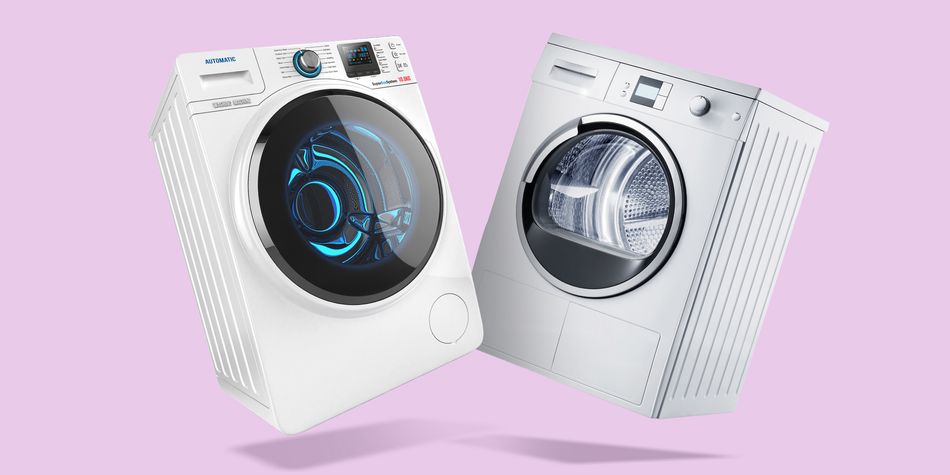
Cleaning a washing machine

Over time, your washing machine can develop a musty smell if you don't clean it. The warm, damp environment is perfect for bacteria. And adding things such as pet hair and everyday dirt into the mix can quickly lead to a messy machine.
Follow these steps monthly to refresh your washing machine:
- Run a regular, hot service wash or use a washing machine cleaner at a slightly lower temperature.
- Clean the rubber seal with a cloth.
- Remove and wash the detergent drawer and lint filter.
- Leave the washing machine's door and drawer open until completely dry.
- If your machine still smells after doing these, check your standpipe for a blockage.
We have more detailed instructions in our guide to cleaning a smelly washing machine